


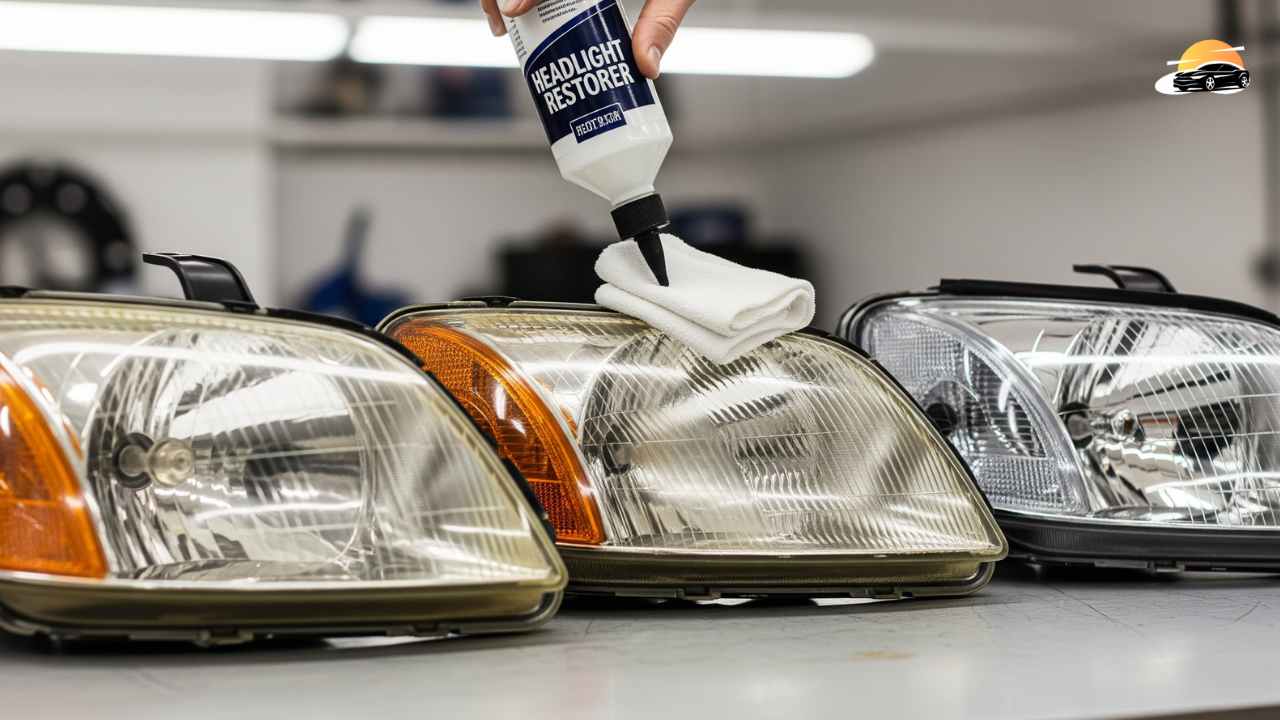
How To Restore Plastic Headlights For Car? So You Can See Clearly! 3M Expands Aftermarket Business As DIY Auto Care Surges
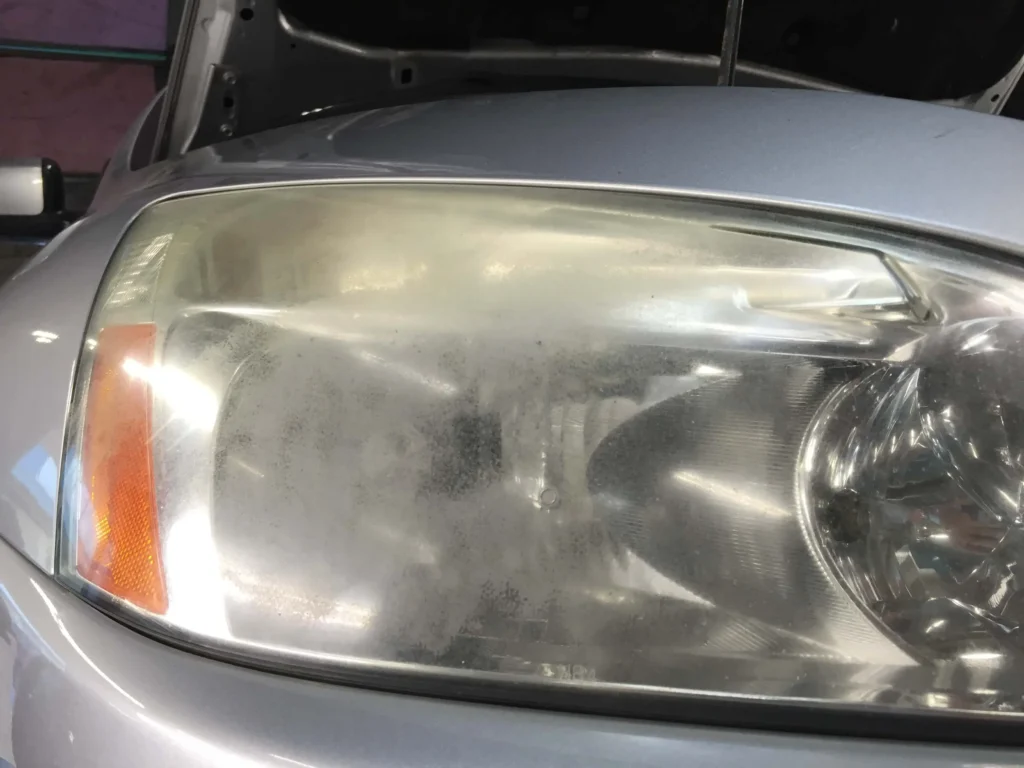
Last year, a National Highway Traffic Safety Administration (NHTSA) report underscored a sobering statistic: nearly 50% of vehicles on U.S. roads have diminished headlight performance, largely due to plastic lens discoloration. That decline caused by oxidation, UV exposure, and poor maintenance translates into millions of drivers navigating at night with less than optimal visibility.
At first glance, it might look like a small detail in the broader auto industry. But headlight clarity isn’t just cosmetic. It’s a safety issue—and increasingly, a business battleground. Companies like 3M, Turtle Wax, and Meguiar’s are turning the once-niche market of DIY headlight restoration kits into a booming aftermarket category. For car owners, the trend offers a cheaper fix than costly headlight replacements. For industry players, it represents a bigger shift: consumers demanding affordable, do-it-yourself solutions at a time when dealership services are pricing out the middle class.
This raises a core question: Can the rising culture of DIY car decor and safety restoration reshape how automakers and parts suppliers court consumers—or will it expose them to even more scrutiny around product quality and long-term reliability?
The Data
Here’s the blunt math. According to AAA Research (2018), deteriorated plastic lenses can reduce headlight effectiveness by up to 80%, drastically shortening nighttime visibility. Meanwhile, the average cost of replacing modern headlight assemblies—especially for LED-equipped cars—can run between $800 and $2,000 per pair, according to RepairPal. That staggering sum helps explain why the $12–$35 DIY headlight restoration kits at retailers like AutoZone and Amazon are selling steadily.
3M, a major chemicals and consumer goods company, controls roughly 30% of the headlight restoration kit market in North America (internal automotive aftermarket data, 2023). Its product line, which combines abrasive pads with UV-resistant sealants, has seen double-digit sales growth for five consecutive years.
The numbers highlight a subtle but crucial divide: consumers are resisting dealership upsells and searching for ways to extend the lifespan of their cars, especially as new-vehicle prices hit record highs in 2024 (averaging $47,500, per Kelley Blue Book). Call it thrift, call it necessity, either way, the market for affordable restoration hacks is now front and center.
Here’s the thing: those aren’t just car care statistics. They point to an underlying consumer sentiment—frustration with rising ownership costs and a willingness to bypass traditional service channels.
(Without falling for overpriced gimmicks)
Let’s be honest—when your headlights turn cloudy, driving at night feels like you’re squinting through wax paper. The problem? Oxidation. UV rays, road debris, and air pollution slowly eat away at the clear outer layer of plastic. Some companies will happily sell you a $200 “restoration service,” but here’s the thing—you can usually fix it yourself for less than the cost of takeout, if you don’t mind a little elbow grease.
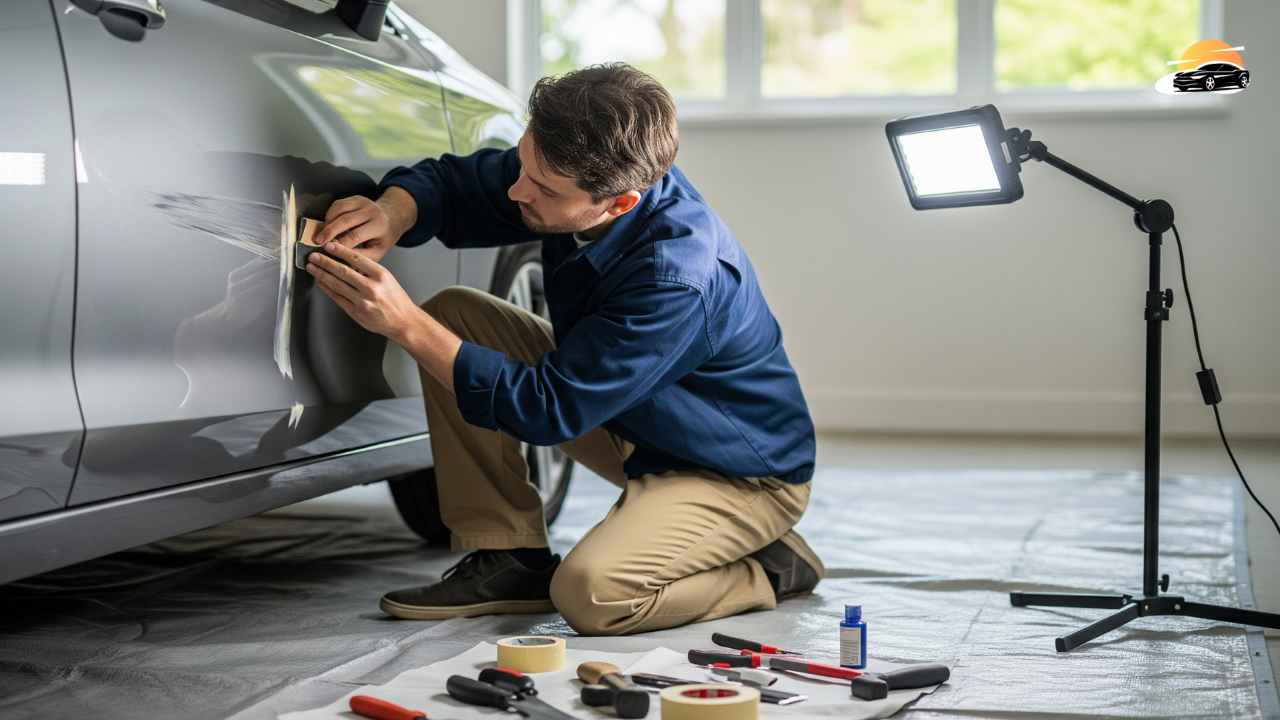
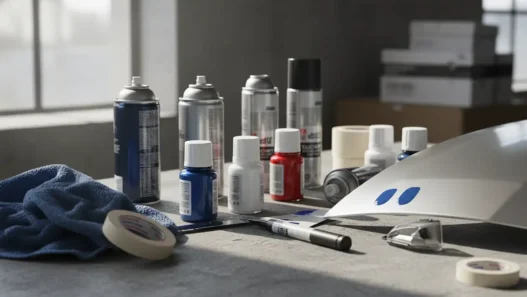
Step 1: Gather What You Actually Need
Before you jump in, you’ll want to line up your tools. Otherwise, you’ll find yourself halfway through, wishing you had the right sandpaper grit.
Here’s the essentials list (think of it like a surgeon prepping a tray, minus the drama):
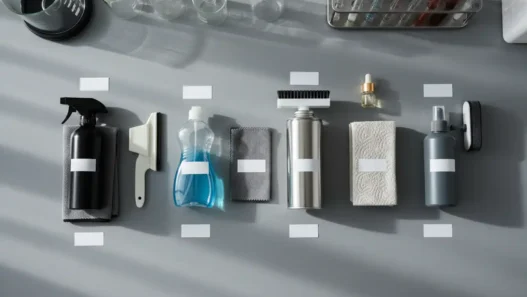
Car wash soap – not dish soap (it leaves residue and can strip wax).
Bucket + sponge – basic, but does the job.
Microfiber cloths – at least three. Regular rags can scratch plastics.
Painter’s tape (blue, low-stick) – to protect paint around the lens.
Wet/dry sandpaper – multiple grits (usually 600 → 1000 → 2000). Most “kits” include this, but buying individually is cheaper.
Spray bottle with clean water – keeps sanding wet (crucial).
Plastic polish (“shiny cream”) – restores clarity.
UV sealant or clear-coat wipes – this is the step people skip, and it’s why headlights keep fogging up again.
💡 Pro tip: A decent $15–25 headlight kit includes the sanding discs, polish, and UV protectant. Don’t let fancy branding fool you—it’s all variations of the same three steps: sand, polish, seal.
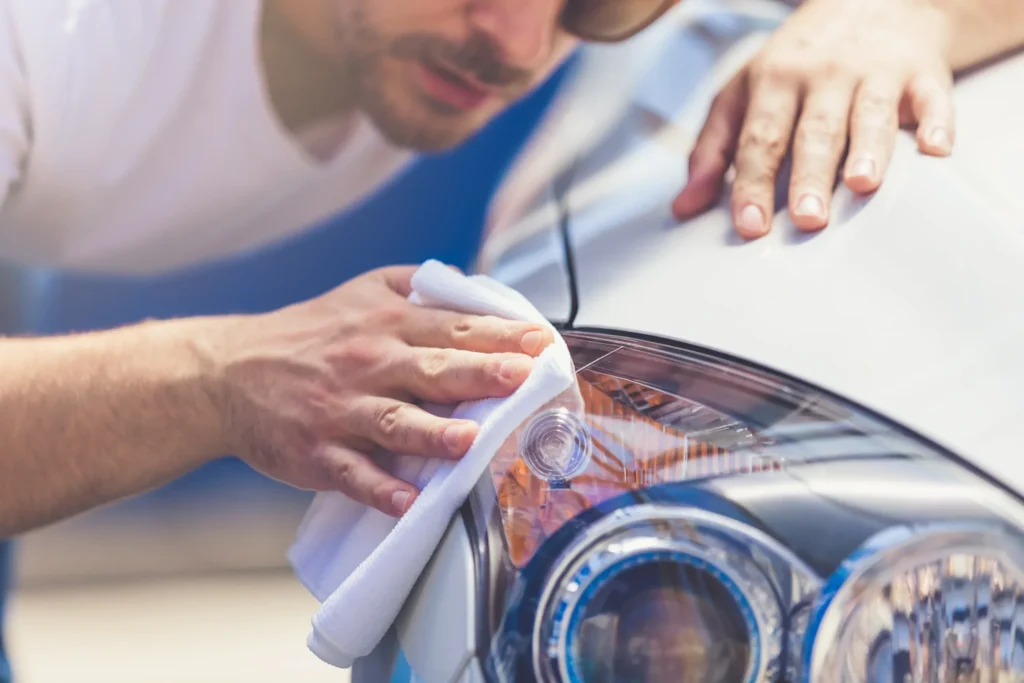
Step 2: Clean Like You Mean It
This sounds trivial, but skipping it is where beginners mess up. Dirt trapped under sandpaper works like gravel, cutting deeper scratches.
Wash each headlight with soap and water.
Rinse thoroughly.
Dry completely with a microfiber cloth.
Think of this as sanding prep, not “just a rinse.”
Step 3: Protect the Paint (a.k.a. Tape Time)
Here’s where being careful saves you from creating a bigger repair job. Stick blue painter’s tape around the perimeter of each light. Four solid layers is better than one half-hearted strip. Sandpaper bites fast—don’t underestimate it.
Step 4: Sand Off the Oxidation (The Cloudy Layer)
This is the make-or-break step. You’re shaving off microns of plastic to expose clear material underneath. Sounds scary, but it’s controlled.
How to do it right:
Start with the coarsest grit (usually 600). Spray water on the lens and sandpaper.
Sand in one direction (horizontal strokes). Keep it wet—if it feels dry, you’re doing damage.
Rinse, wipe clean, then switch to 1000 grit. Now sand vertically.
Finish with 2000 grit. Circles or crosshatch strokes work here.
Each stage removes the scratches of the previous one. When done correctly, headlights look hazy-but-even, not crystal clear yet. That comes next.
Subjective take? This step feels a little nerve-wracking the first time, like you’re wrecking your headlights on purpose. But trust the process—clarity comes later.
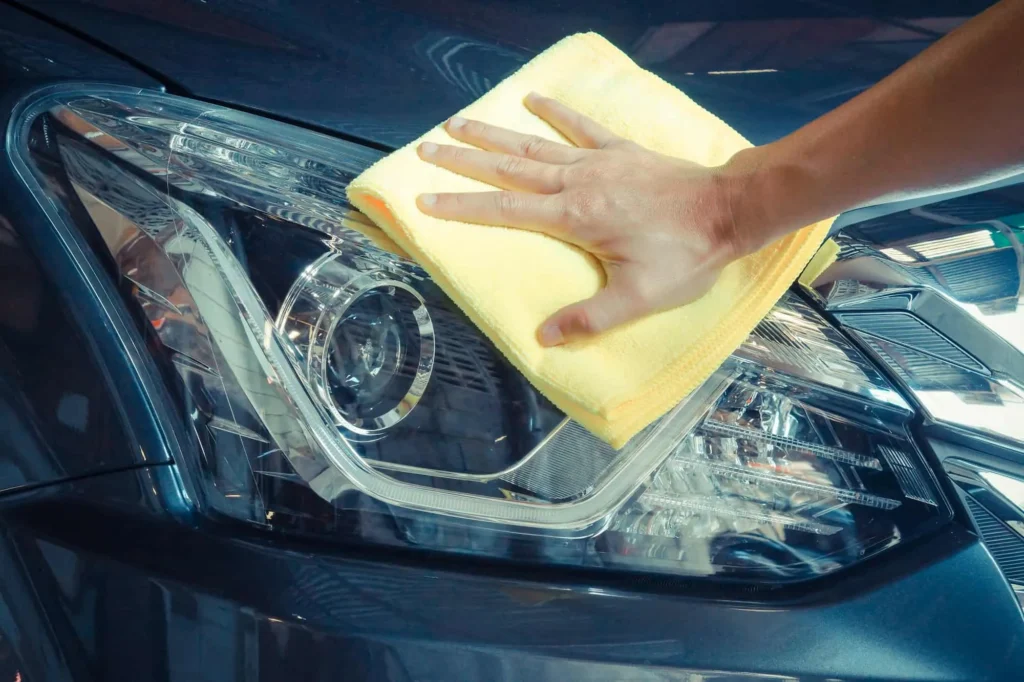
Step 5: Polish to Restore Clarity
Now we swap abrasion for shine.
Apply plastic polish to a clean microfiber.
Rub in small, tight circles with firm pressure.
Buff until the cloudiness disappears and a glassy finish emerges.
If you’ve got access to a low-speed drill with a foam pad, it speeds this up—but it’s optional.
This is the “wow moment,” where headlights shift from dull to bright in your hands.
Step 6: Seal It—or Be Back Here in Six Weeks
Here’s where a lot of DIY guides get sneaky. If you skip UV protection, the plastic just oxidizes again in a month or two. That’s why some businesses don’t mention it (repeat sales).
Options:
Dedicated UV sealant wipes – simple, effective, usually included in decent kits.
Automotive clear coat (spray-on) – longer lasting but fussier. Tape off edges well if you go this route.
Car wax – better than nothing, but won’t hold more than a couple of weeks.
Don’t skip this step. Without a barrier, you’re just polishing plastic for short-term wins.
Step 7: Test and Admire
Peel off the tape, step back, and wait for the evening. Turn on the lights—you should see a noticeable improvement in brightness, often 30–40% stronger according to repair forums (grain of salt there, but the improvement is obvious).
Bottom Line
DIY headlight restoration isn’t rocket science. It’s more like careful sanding in stages, followed by polish and UV protection. Kits just bundle the same parts you can buy separately.
If you want lasting results:
Sand evenly
Keep everything wet
Seal against UV
Ignore upsells that claim “permanent clarity” (plastic is plastic, not magic glass).
This smells like one of those quick-fix chores where the “pro” service markups border on daylight robbery. The truth? With one free weekend afternoon and $20 in supplies, you’ll see just as clearly as the guy who dropped $200 at the dealership.
The People
“A decade ago, nobody cared about plastic headlights looking cloudy—it wasn’t even on the radar,” said Mark Daniels, a former aftermarket executive at Advance Auto Parts, in an interview. “Now, visibility issues are a top reason for DIY car care. Safety and style have merged into the same conversation.”
On the consumer side, millennial and Gen Z drivers—already squeezed by car loan rates approaching 8% (Experian, Q2 2024)—are disproportionately drawn to low-cost alternatives. Social media feeds are filled with before-and-after videos of cloudy headlights turning factory-fresh in under 30 minutes. While TikTok trends don’t always translate into sustained consumer behavior, in this case, the visual proof is powerful marketing.
Auto care influencers, often running garage-based YouTube channels, have amplified the rise of headlight kits. One such creator, who goes by BudgetWrench, told Forbes-style outlets he earns affiliate revenue from 3M and Chemical Guys sales: “Headlights are the perfect gateway project. People start with a 25-dollar kit, and suddenly they’re buying ceramic coatings, orbital buffers, the works.”
Even traditional automotive players are paying attention. A Toyota service manager, speaking off record, admitted that the dealership markups on OEM headlight replacements are “insane,” and he sometimes subtly recommends aftermarket kits to frustrated customers. This smells like an industry quietly caught between protecting lucrative parts sales and addressing consumer pushback.
The Fallout
The fallout is two-fold: safety implications and corporate positioning.
First, the safety angle. According to IIHS (Insurance Institute for Highway Safety), only about 30% of factory headlights tested in 2023 earned a “Good” rating. Combine that with widespread lens degradation, and you’re left with millions of cars performing well below intended standards. That puts insurers, regulators, and even litigation lawyers on alert. If a crash occurs and degraded headlights are cited as a factor, legal exposure could widen—not just for owners, but conceivably for manufacturers who design fragile plastic lenses prone to early yellowing.
Second, the corporate positioning. Companies like 3M benefit here, not just in direct sales, but in brand optics. By anchoring themselves as problem-solvers for safety visibility, their consumer division looks less like a commodity seller of sandpaper and adhesives—and more like a trusted protector of drivers. The aftermarket, however, is viciously competitive. Turtle Wax and Mothers polishes have launched nearly identical kits, while Amazon’s no-name imports undercut big brands at half the price.
For automakers, the irony cuts deeper. Their push for sleek, lightweight plastics in headlights (to meet fuel economy and design aesthetics) inadvertently created the very aftermarket problem now siphoning consumer dollars away from OEM dealerships. Industry insiders whisper that some manufacturers toyed with the idea of integrating permanent anti-UV coatings from the factory—but abandoned the effort when long-term durability would undermine lucrative replacement sales.
Consumers, meanwhile, are stuck balancing cost and performance. While DIY kits work, they’re not always permanent. Within 12–18 months, many headlights begin fading again unless owners are diligent about re-coating. That sets up a recurring-cycle business model not unlike printer ink. Analysts now predict that the headlight restoration subcategory could surpass $500 million annually worldwide by 2027, if current growth tracks.
The Bigger Picture: Headlights as a Proxy for Auto Affordability
Step back, and the cloudy headlight is really a metaphor for today’s car market: vehicles are more expensive, more complex, and harder to maintain than ever. The smallest fixes—once handled by shade-tree mechanics—are now monetized services costing hundreds of dollars. At the same time, consumers armed with YouTube tutorials and $20 kits are increasingly unwilling to play along.
This tension cuts across industries. Paint protection film. Ceramic coatings. DIY wrap kits. All are seeing growth as drivers squeeze out more years from their vehicles amid rising costs and economic uncertainty. But headlights are unique because they straddle vanity and safety: it’s hard to ignore your car looking tired, and harder still to ignore not seeing well on an unlit road.
One could argue that companies like 3M didn’t just stumble into a new profit center—they capitalized on a latent design flaw left unattended by automakers. If that perspective gains traction, pressure could mount for regulatory changes mandating tougher headlight durability standards. And that might reset the balance entirely, shifting demand back to OEM solutions.
Closing Thought
At one level, restoring plastic headlights seems like a simple story about sandpaper, polish, and elbow grease. At a deeper level, it exposes the growing friction between automakers chasing revenue in every replacement part, and consumers choosing to hack the system with cheaper, faster alternatives.
With over 100 million cars in America running headlights past their peak effectiveness, this is far from a niche issue. And as consumer trust splinters, the real question isn’t whether DIY restoration kits will keep selling—they will. The bigger question is this: Will automakers adapt by providing longer-lasting solutions, or will headlight restoration become another multi-billion-dollar category proving that cost-cutting at the factory always fuels opportunity in the aftermarket?